...
| Info |
|---|
A project default value can be overwritten by an issue default value for a specific issue. |
| Info |
|---|
Only project administrators are able to set this configuration. |
How to set the project default value
| Description | Screenshot |
|---|
| 1 | Open a project and click on “Project settings” on the left.
|  Image Modified Image Modified |
| 2 | Click on “MOCO Settings” on the left
| 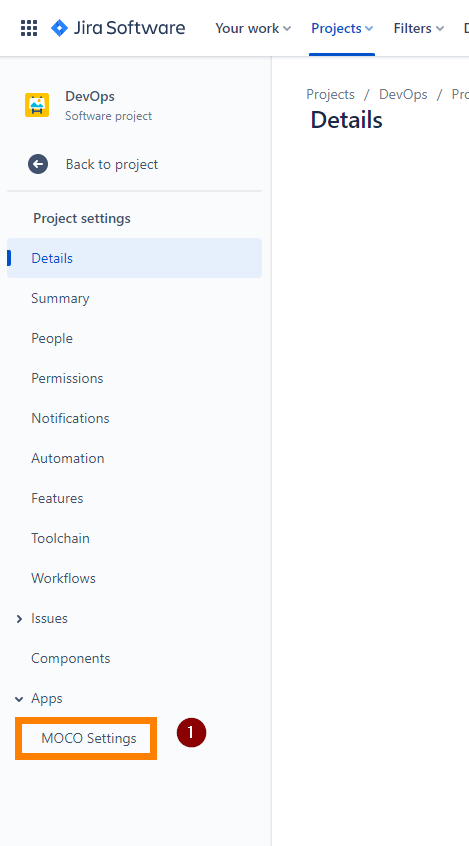 Image Modified Image Modified |
| 3 | | Info |
|---|
By selecting customer, project and task, you define for which task the time recorded in Jira should be logged in MOCO. |
| Info |
|---|
You can only see the customers, projects and tasks for which you have permission in MOCO. |
Set the toggle to checked like in the screenshot Select a Customer Is a required field Has to be selected before you can select Project and Task
Select a Project Is an optional field Has to be selected before you can select a Task
Select a Task Is an optional field
Click on “Save” to set the project default value for the current project
| 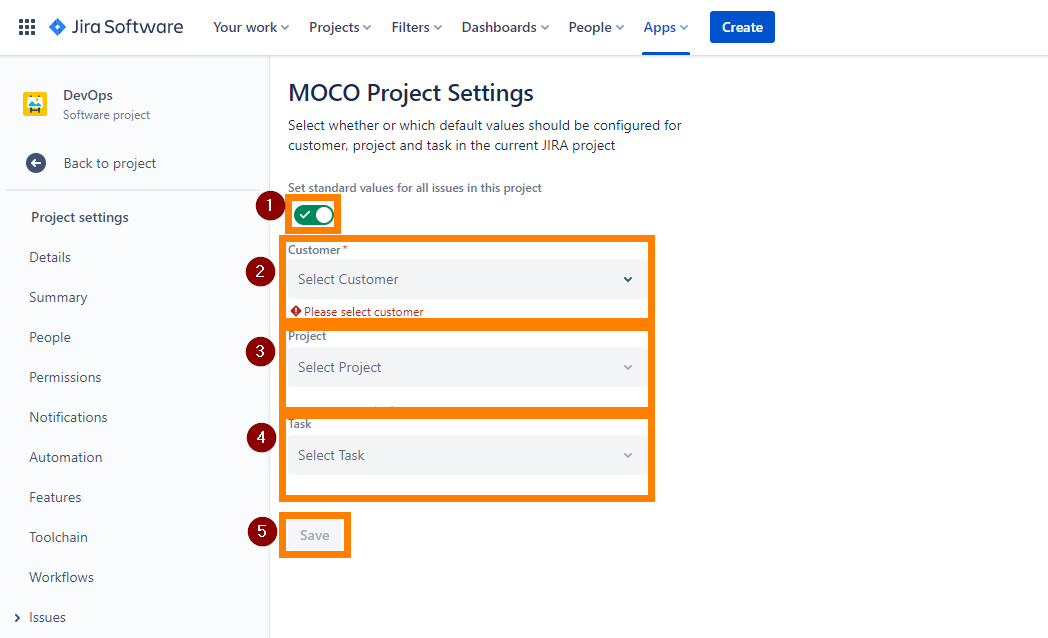 Image Modified Image Modified |
How to remove a single project default value
If you no longer want a default value for the project, you can remove it with the following steps:
| Description | Screenshot |
|---|
| 1 | Open a project and click on “Project settings” on the left.
| Image Modified |
| 2 | Click on “MOCO Settings” on the left
| Image Modified |
| 3 | If you no longer want to have a default value for the Project, click on the delete icon in the field. If you no longer want to have a default value for the Task, click on the delete icon in the field. Click on “Save”
|  Image Modified Image Modified |
How to remove all project default values
If you no longer want the default values for the project, you can remove them with the following steps:
| Description | Screenshot |
|---|
| 1 | Open a project and click on “Project settings” on the left.
| Image Modified |
| 2 | Click on “MOCO Settings” on the left
| Image Modified |
| 3 | Set the toggle to unchecked like in the screenshot Click on “Save”
| 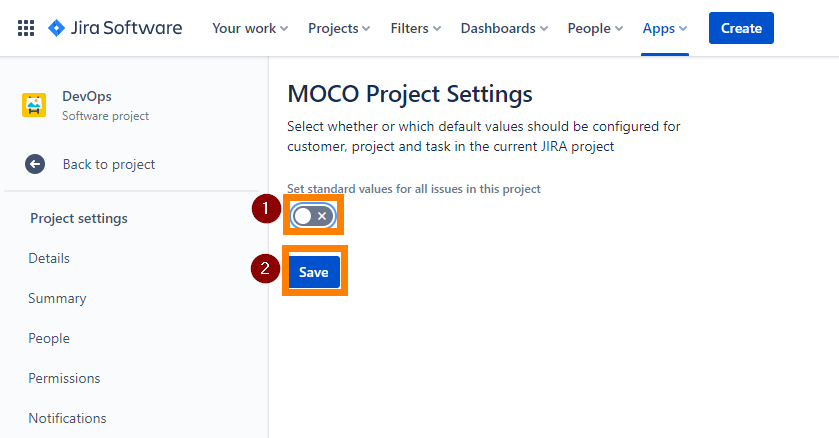 Image Modified Image Modified |