If you want to log time in Jira and sync it to MOCO you have 4 different options to do it. We will explain every option on this page.
If you can not see the button “Log time” or “Start Timer”
Click on “Add MOCO time tracking”

| Description | Screenshot |
|---|
| 1 | Open the detail view of an Issue e.g. by clicking on the Issue Card in a Kanban Board.
| 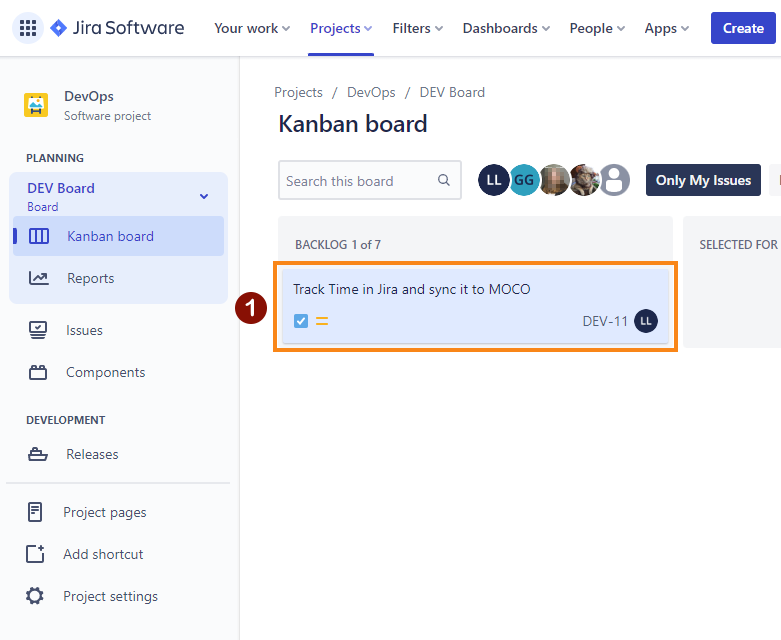 |
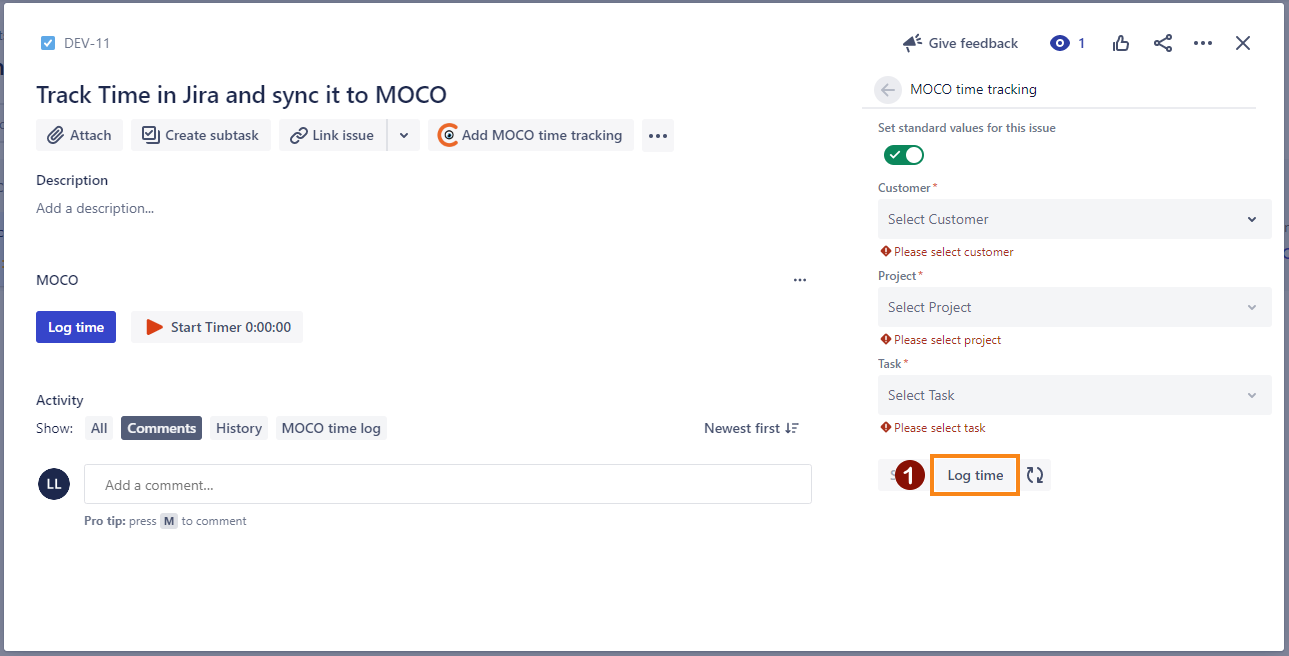
| 2 | Click on the button “Log time” (If you do not see the button, have a look at the information at the top of this page).
→ A new window will open.
| 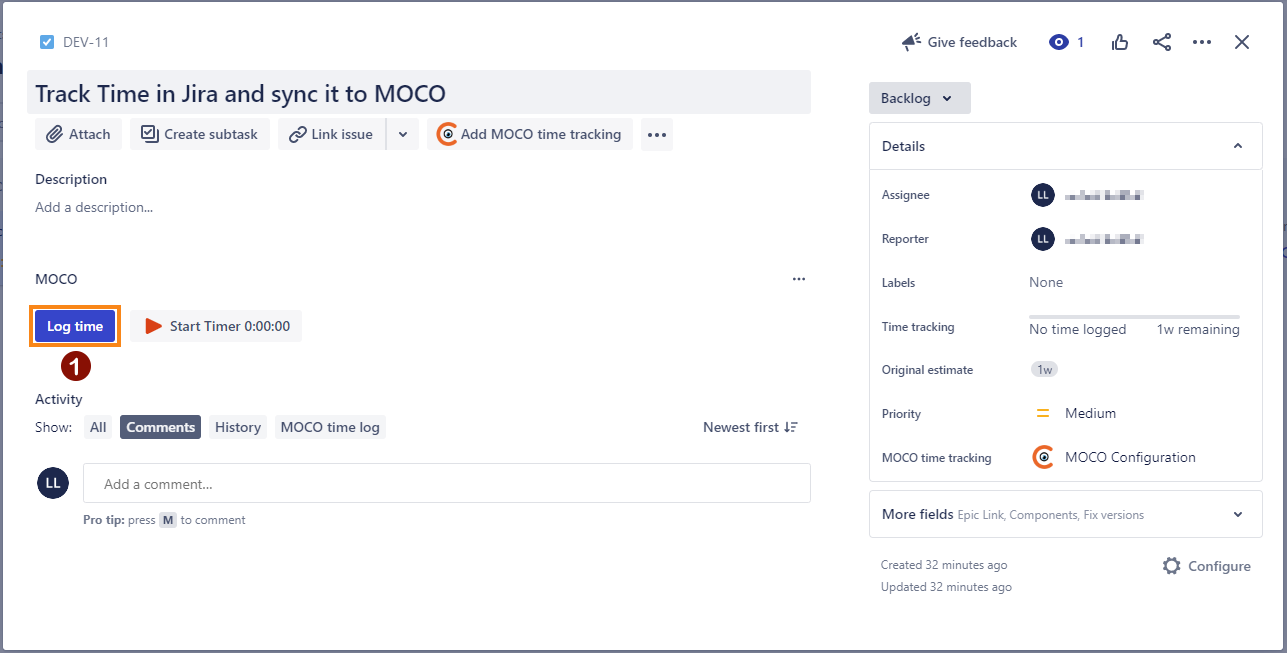 |
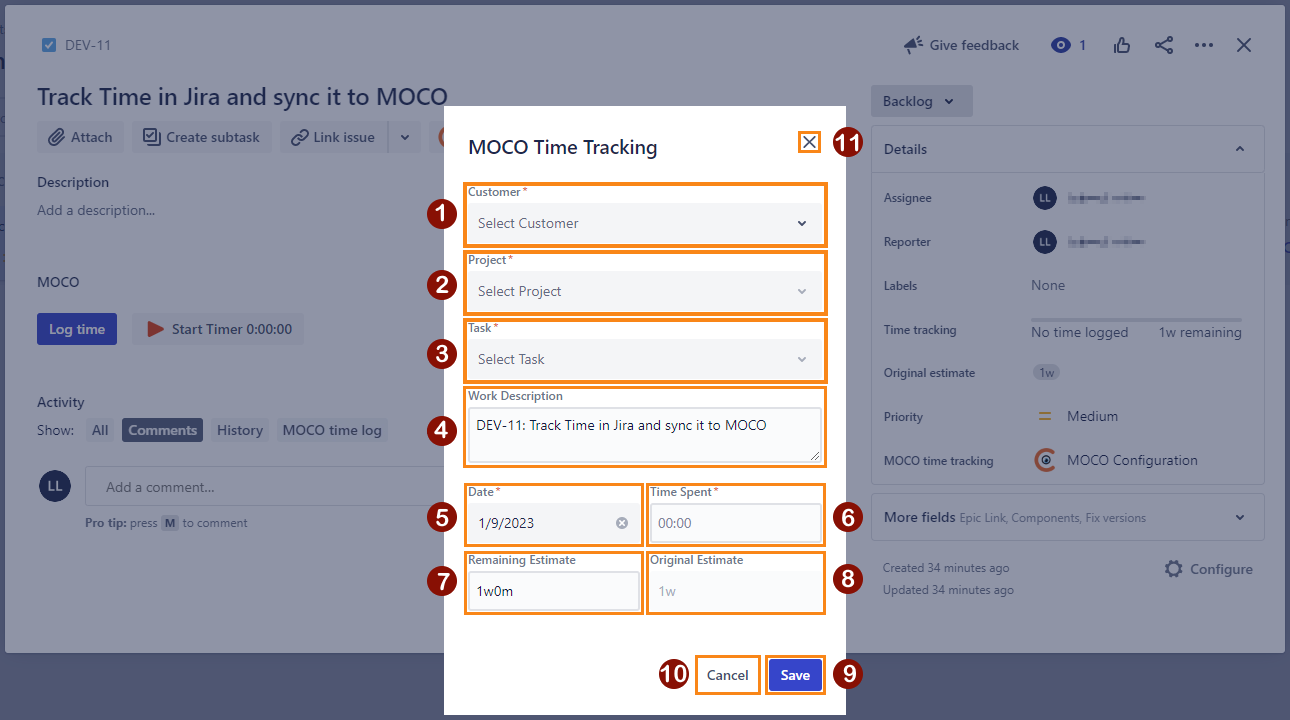
| 3 | List of customers in MOCO that you are allowed to see. Has to be selected before you can select project and task.
List of projects in MOCO that are related to the customer that has been selected in step 1 and that you are assigned to in MOCO. Has to be selected before you can select a task.
List of tasks in MOCO that are related to the project that has been selected in step 2. Here you can write a short work description of what you have done. This will be saved in the MOCO field “description”. By default the combination of issue key and Summary will be shown here. You can just overwrite it if you want.
Here you can select the date for that you want to log the time. By default it will show the current date. Of course you can change it to another date.
Enter the amount of time you want to log in Jira and MOCO. You can enter the time in 2 formats: e.g. “01:30” or “1,5”. Both will be 1 hour and 30 minutes in the end. Here you can add the Remaining Estimate for the current issue. You can use the normal Jira formatting like “2w 3d 6h 45m” for Remaining Estimate.
This field displays the Original Estimate of the issue and is a read-only field. Click on “Save” to log the time in Jira and MOCO. You get a confirmation message if everything was successful. You can close the window by clicking "Cancel". The time will not be logged in Jira or MOCO. You can close the window by clicking the "X". The time will not be logged in Jira or MOCO.
|  |
Option 2: Issue detail view - MOCO configuration screen
| Description | Screenshot |
|---|
| 1 | Open the detail view of an Issue e.g. by clicking on the Issue Card in a Kanban Board.
| |
| 2 | Click on the button “MOCO Configuration” on the right side.
| 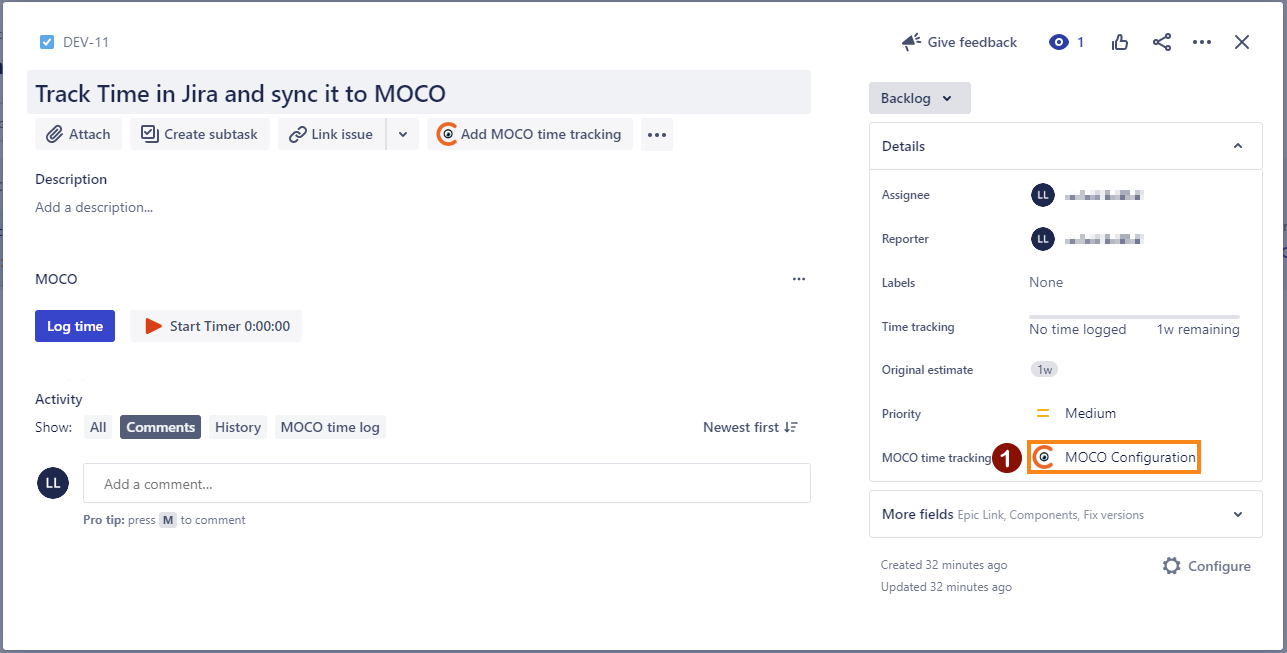 |
| 3 | Click on the button “Log time” on the right side.
→ A new window will open.
|  |
| 4 | List of customers in MOCO that you are allowed to see. Has to be selected before you can select project and task.
List of projects in MOCO that are related to the customer that has been selected in step 1 and that you are assigned to in MOCO. Has to be selected before you can select a task.
List of tasks in MOCO that are related to the project that has been selected in step 2. Here you can write a short work description of what you have done. This will be saved in the MOCO field “description”. By default the combination of issue key and Summary will be shown here. You can just overwrite it if you want.
Here you can select the date for that you want to log the time. By default it will show the current date. Of course you can change it to another date.
Enter the amount of time you want to log in Jira and MOCO. You can enter the time in 2 formats: e.g. “01:30” or “1,5”. Both will be 1 hour and 30 minutes in the end. Here you can add the Remaining Estimate for the current issue. You can use the normal Jira formatting like “2w 3d 6h 45m” for Remaining Estimate.
This field displays the Original Estimate of the issue and is a read-only field. Click on “Save” to log the time in Jira and MOCO. You get a confirmation message if everything was successful. You can close the window by clicking "Cancel". The time will not be logged in Jira or MOCO. You can close the window by clicking the "X". The time will not be logged in Jira or MOCO.
|
|
Option 3: Issue detail view - Using the timer
| Description | Screenshot |
|---|
| 1 | Open the detail view of an Issue e.g. by clicking on the Issue Card in a Kanban Board.
| |
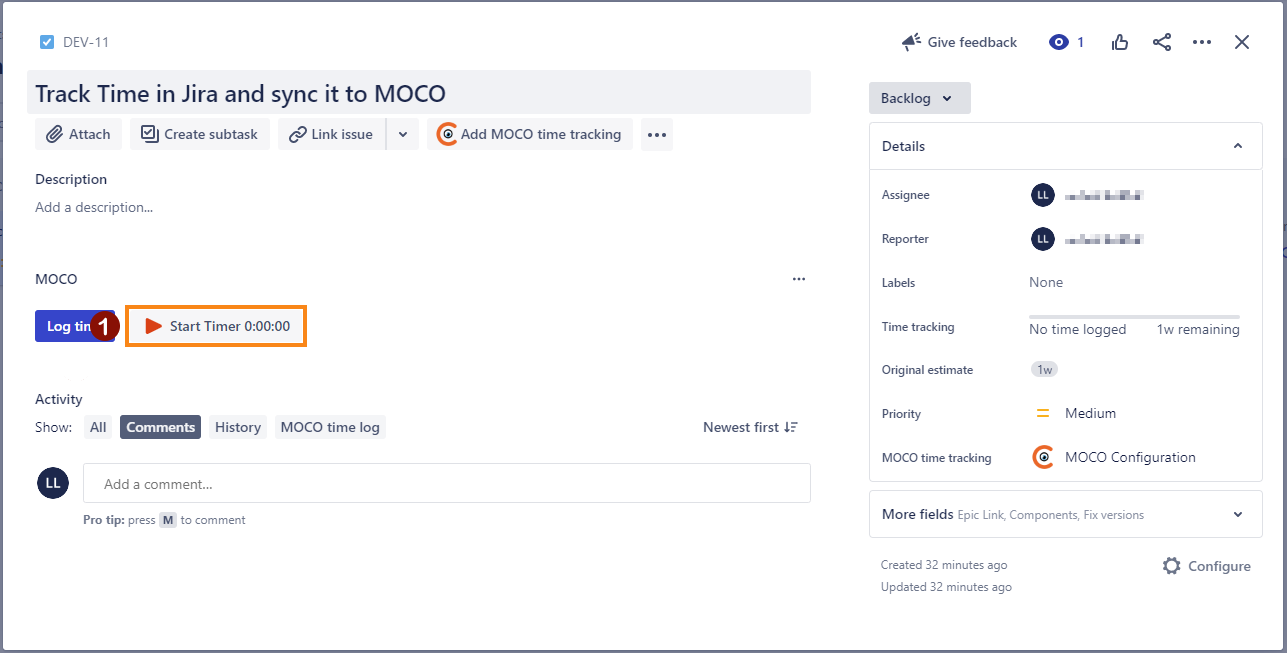
| 2 | Click on the button “Start Timer” (If you do not see the button, have a look at the information at the top of this page).
→ The timer will start counting up.
|  |
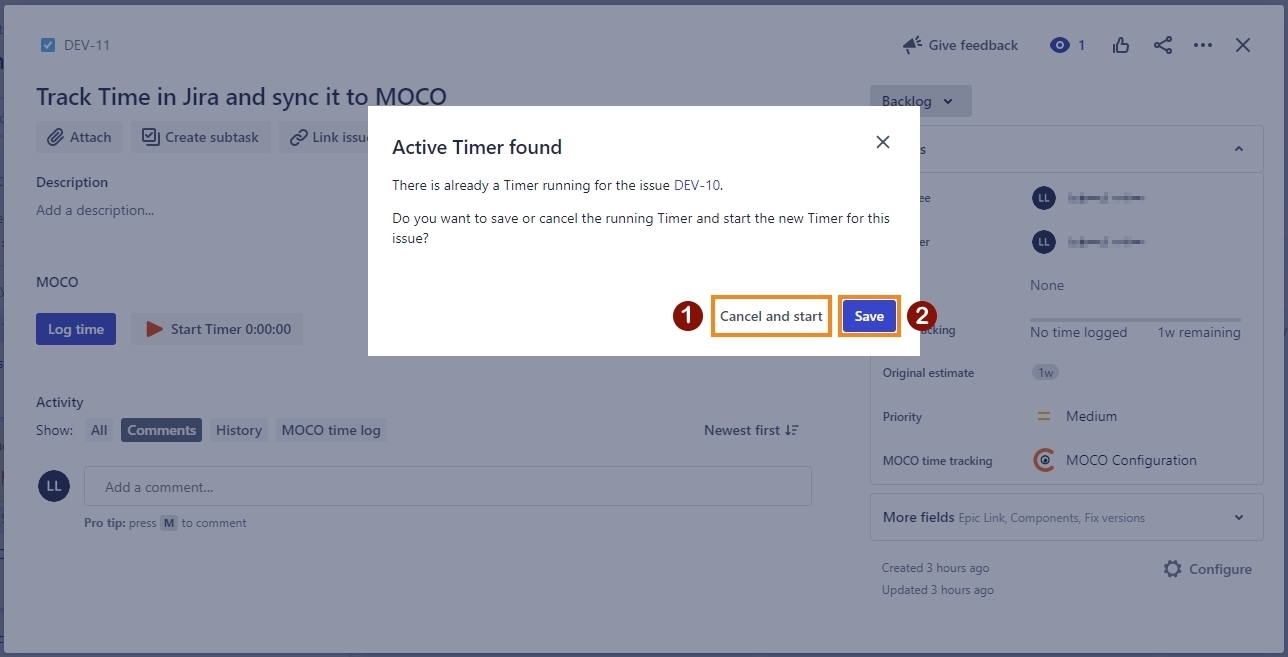
| 3 | If you have already started a timer in another issue, this window appears. You can decide whether to save and log the time or discard the running timer and start a new one. To discard the running timer and start a new one, click on “Cancel and start”. To log the time from the running timer, click on “Save”.
→ You will be redirected to the issue with the running timer and can continue with step 5.
|  |
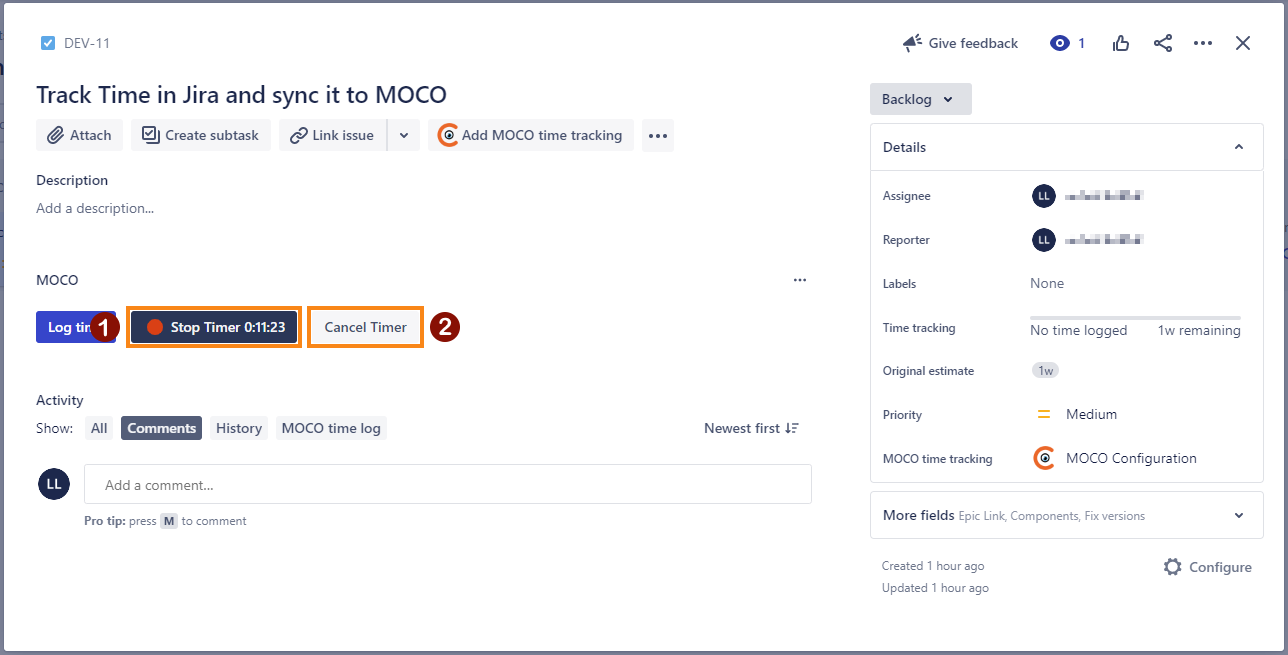
| 4 | Click the button “Stop Timer”
→ a new window will open To discard the timer, click on “Cancel Timer”
|  |
| 5 | List of customers in MOCO that you are allowed to see. Has to be selected before you can select project and task.
List of projects in MOCO that are related to the customer that has been selected in step 1 and that you are assigned to in MOCO. Has to be selected before you can select a task.
List of tasks in MOCO that are related to the project that has been selected in step 2. Here you can write a short work description of what you have done. This will be saved in the MOCO field “description”. By default the combination of issue key and Summary will be shown here. You can just overwrite it if you want.
Here you can select the date for that you want to log the time. By default it will show the current date. Of course you can change it to another date.
The time determined by the timer is automatically entered here. If you want, you can adjust the time you want to log in Jira and MOCO. You can enter the time in 2 formats: e.g. “01:30” or “1,5”. Both will be 1 hour and 30 minutes in the end. Here you can add the Remaining Estimate for the current issue. You can use the normal Jira formatting like “2w 3d 6h 45m” for Remaining Estimate.
This field displays the Original Estimate of the issue and is a read-only field. Click on “Save” to log the time in Jira and MOCO. You get a confirmation message if everything was successful. You can close the window by clicking "Cancel". The time will not be logged in Jira or MOCO. You can close the window by clicking the "X". The time will not be logged in Jira or MOCO.
|
 |